Monday, September 28, 2020

Veal with Vodka Sauce

Now that activities are starting to creep back into our calendar and school is back in "session" I like to turn to my tried and true weeknight recipe stash to get dinner on the table quickly and with little effort. Thought I'd share one of our all-time family favorite weeknight recipes- veal with vodka sauce.  This recipe comes together in no time and only has a few staple ingredients that we typically  have on hand which is helpful when you find yourself without a dinner plan or if things just don't go as planned in general (am I right?!). The bonus is that everyone in my house can now make this meal independently which is a mom WIN!! 

Total Cook Time: 30 minutes

You will need:
1.5 lbs ground veal*
3-4 large handfuls of baby spinach
1 lb pasta of your choice 
1 jar of vodka sauce (I prefer Newman's Own brand)
1-2 cloves of garlic chopped fine
Olive oil
grated Parmesan cheese ( I prefer Parmigiano Reggiano)


First get a large pot of water on the stove to boil. Then add a liberal amount of olive oil over medium heat in a high-sided skillet. Once the pan is hot add in the garlic and stir around until fragrant. When it just starts to brown, add in the ground veal and cook to let the meat brown and caramelize, about 5 minutes.  Season with salt and pepper.


When the veal is cooked through, throw in the baby spinach and stir around to let it wilt. Then add in 3/4 the jar of vodka sauce. Turn the heat down to low, cover and let simmer until your pasta is cooked.


Once the pasta is cooked through place in bowl and top with veal mixture. Grate some Parmesan cheese on top and enjoy! 


**Want to switch it up?!!**
- substitute ground chicken or turkey for the veal 
- substitute your choice of tomato sauce for the vodka sauce 
- omit the baby spinach and use mushrooms instead!

Buon appetito!

Monday, September 7, 2020

Garden Fresh Roasted Tomato Sauce
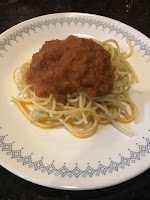
I really can't believe summer is over! This year has both dragged on and flown by at the same time. I am holding on to the last shreds of the simplicity of summer with this dish. There's nothing better than the smell of a homemade sauce. This version uses a different cooking method than the traditional sauce that simmers on the stove all day. By roasting the ingredients it takes on a lighter but rich flavor and texture and comes together in no time, in fact most of the cooking time is hands off. Of course this is a fabulous way to use up the end of summer garden tomato bounty but store bought tomatoes would work here too! I prefer Roma tomatoes for this recipe because they hold up to the cooking method and give a great texture but you can use really any kind you have on hand.  I like to let the sauce shine here and simply serve it over spaghetti but you could substitute this sauce in any recipe. I bet it would make an awesome zucchini parm!

Chef's Note: I recommend an immersion blender for this recipe. They are relatively inexpensive and can be used for LOTS of recipes! It's one of my favorite kitchen gadgets... If you don't have one then you can use a high speed blender instead. 

Total Cook Time: 1 hr 15  minutes
You will need:
*6-8 tomatoes
*1 large sweet yellow onion
3-4 cloves of garlic
olive oil
coarse salt
italian seasoning
basil
**This is really more of a method rather than a recipe in that you can use as many or as few tomatoes as you like. Obviously the more you use the more sauce you have!


First get the tomatoes halved and chop up your onions in chunks. Finely dice garlic.


 Next squeeze the seeds and juices out into a sieve over a bowl. You will want to keep the juice but nobody wants seeds in their sauce!


Dump the tomatoes, garlic and onions into a shallow casserole dish.  You now want to season them!  I personally love this Italian seasoning blend from  Penzeys but if you don't have a blend you can use some dried basil, oregano, garlic salt and onion powder to taste. Sprinkle over the dish and then liberally salt and give a few glugs of olive oil over the top.  Lastly pour in the reserved tomato juice. 


Toss all by hand an arrange as a single layer (as best you can).  . .


Pop in preheated oven at 375 degrees for 40-45 minutes.. When it comes out of the oven it already looks and smells delicious!  But now it's time to turn these tomatoes into sauce... Transfer to a sauce pan and let sit for 10-15 minutes to cool slightly as you boil water for pasta.  


Then using an immersion blender you want to gently blend the ingredients together to your desired texture/consistency aka how "chunky" you like your sauce.  You can now add some torn basil if you wish for extra flavor. 


Time to enjoy the fruits of you labor by dishing the sauce up over your favorite pasta and digging right in!                                                


PS... Got more tomatoes? Make another batch and freeze in a gallon ziplok to channel summer any time of the year!!

Sunday, August 16, 2020

Sunday Tea Time- Coconut Raspberry Scones

Tea time has become a daily ritual in the Perkins' household. During "Coronacation" my girls have taken a significant liking to all things British. They have perfected their British accents, been watching Downton Abbey and have been studying British culture. They did chores and pooled their money together to buy their own tea set online and have been whipping up tea treats for 3 o'clock regularly.  This recipe was a recent Pinterest discovery and has now become one of their favorites. The coconut and raspberry combination lends itself well to summer and produces a just sweet enough treat to go perfectly with the tea. Abigail joined me in the kitchen for today's blog post. Although the total cook time is an hour, 30 minutes is spent freezing the dough so really there's nothing to it!


What You'll Need:

  • 2 1/2 cups all-purpose flour
  • 1/2 cup granulated sugar
  • 1 tablespoon baking powder
  • 1/4 teaspoon kosher salt 
  • 1/2 cup cold butter (cut into small pieces) 
  • 2 large eggs
  • 3/4 cup coconut cream (save about 2 tbsp for brushing) 
  • 1 cup raspberries (frozen would also work) 
  • 1/2 cup shredded unsweetened coconut
  • 2 teaspoons sugar
  • 1/2 teaspoon ground cinnamon

Total Prep and Cook Time- 60 min, Yields 8-9 scones


Measure the flour, 1/2 cup sugar,  salt and baking powder in large bowl and whisk to mix them well.  Next use a pastry cutter to incorporate the butter into the flour mixture


In a separate bowl whisk eggs and coconut cream together.....


Add the wet ingredients into the flour mixture and stir until just moist


Gently fold in the shredded coconut and raspberries until just combined- dough will be sticky!!


Now for the fun (and messy) part- kneading the dough! Turn the dough out onto a VERY well floured surface and knead lightly to form a 3/4 inch disk. If the dough feels too sticky add a little more flour as you go


Use a biscuit cutter (or a glass) to cut out circles and place them on a cookie sheet lined with either a silpat baking matt or parchment paper. You should get about 8-9 scones depending on what type of cutter you use.


Mix together the cinnamon and 2 tbsp sugar. Brush scones with the remaining coconut cream and sprinkle cinnamon sugar mixture over the top.   Pop the scones into the freezer for 30 minutes.  


Then preheat oven to 400 degrees and bake for 20 minutes until scones are lightly golden brown
Let cool on wire rack. 


Fix yourself a spot of tea and enjoy!!


Tuesday, July 28, 2020

Taco-ish Tuesday- Cheesy Taco Pasta

Cheesy Taco Pasta

I can't say I grew up with Taco Tuesdays, in fact my parents never made tacos even once in my entire childhood.. Italians don't often cook Mexican food, or any other food other than Italian for that matter LOL. I guess that is why my kids have essentially been deprived of Taco Tuesdays as well however I recently came across a taco-ish recipe that I could get behind and it has fast become one of our weeknight favorites... let's be real- I can't always get my SH*% together to coordinate it with a Tuesday. Try it out and see if it makes your Tuesday rotation! 


Total Cook Time: 30 minutes
You will need:
1.5 lbs ground beef
1 can diced tomatoes (I prefer petite diced )
1/2  lb elbow pasta
shredded mexican cheese
canola oil

1 packet of Taco seasoning**


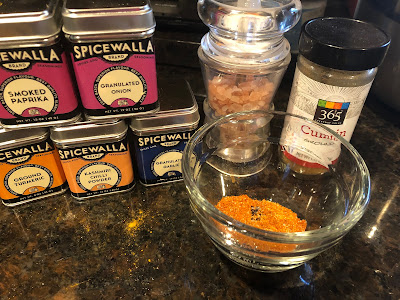
** When I'm feeling extra fancy I make my own taco seasoning blend using cumin, garlic powder, onion powder, smoked paprika, chili powder and a little salt. I don't really measure, just toss together a little of each to my preference. You can't go wrong! My favorite spices right now are the starter set I got on Amazon from Spicewalla- they are super flavorful, and plus I love the tins they come in, aren't they so cute?!  


First up get your pasta water on to boil and then make your spice mixture..


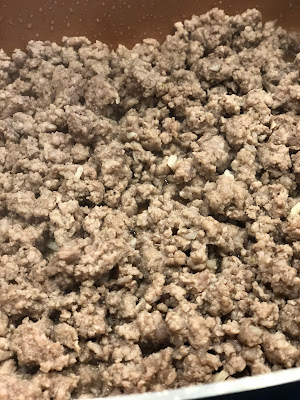
Then heat a small amount of canola oil in a pan over medium/high heat in a high-sided skillet. When the oil gets hot add in the ground beef and brown it up, about 8-10 minutes.


Once beef is cooked through, lower heat to medium, drain excess oil/liquid and add in a can of diced tomatoes as well as your taco seasoning mixture and stir well.


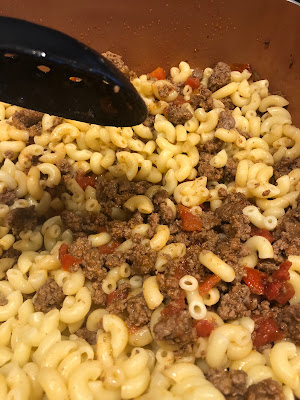
When pasta is cooked drain and add it to the pan with the beef and tomatoes....


Now comes the fun part- add the cheese and stir until melted and gooey- 


Dish it up and dig in!


**Want to switch it up?!!**
- substitute ground chicken or turkey for the beef. 
- omit the pasta and have it over nachos!
- spice it up with 1/2 a can can of chili in adobe sauce
-add chopped up red or green bell peppers when browning beef for more veggies


Thursday, July 16, 2020

Making Lunch Great Again- Pasta with Ricotta and Roasted Beets

Ok,  I have a confession to make- as much as I LOVE food... I absolutely hate lunch.  I find it to be such a useless meal.  I never want to take the time to make it and nothing ever appeals to me. There are so many amazing breakfast recipes and of course dinner ideas but really what is there for lunch that makes it special? Don't get me wrong, I'm not opposed to a lunch date- a lunch that I don't have to make or eat alone but other than that I'd rather just skip it all together. Since I do get hangry if I go too long without food I've been trying to think outside of the box for lunch.  To make things more difficult I go through periods where I lose my taste for meat and so that narrows my lunch options even more...

Enter this recipe... I found it scrolling through Pinterest one day and it caught my eye. I like how it is simple yet filling and easily lends itself to be switched up a bit to keep it interesting.  This dish also comes together quickly, especially if you roast up the beets ahead of time. Sometimes if I've had a carb loaded breakfast I even skip the pasta and just have the "toppings" because why not!?


Total cooking time:  30 minutes- 15 if you pre-cook the beets!
Makes 4 servings
What you'll need:
2-3 beets peeled and chopped*
2-3 large handfuls of greens**
1/2 lb medium size pasta
1.5 cups good quality whole milk ricotta***
Lemon
olive oil

* my favorite is to use red beets but golden beets work well here too!
**I use beet greens- did you know they are edible!? But you could also use baby spinach, swiss chard or really any leafy green that can be sauted
**always go for whole milk for ultimate creaminess, my favorite brands are Maplebrook Farms and Belgiosio Ricotta con latte

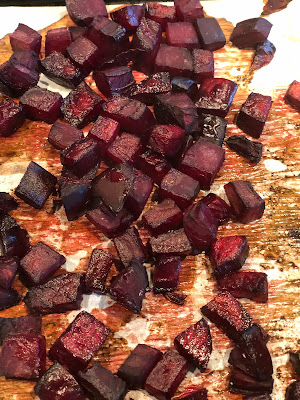
First up get your beets peeled, chopped and roasted- spread on cookie sheet lined with either foil or parchment paper, drizzle with olive oil and salt/pepper and roast at 400 degrees 20-25 min


Put on a pot of salted water for the pasta- sit and read a book while you wait for the beets and water to do their things!.... 

Once pasta goes into boiling water it's time to saute up your greens of choice, a little olive oil in the bottom of a skillet and toss greens in until they wilt, season with salt and set aside


Once pasta is cooked al dente (a.k.a. has a little firmness still- no one likes soggy noodles) divide in bowls and top with a dollop of ricotta cheese followed by the sauted greens and beets.  For the finishing touch grate some lemon peel over the dish- it really wakes up the flavors!!


Now you are ready to enjoy lunch! xo


Sunday, June 21, 2020

Easy Italian Wedding Soup

Many people may not know this about me but I am a first generation American on my mother's side. Like the rest of her family, my mother was born in Italy and moved to the US when she was about 3 years old. Even after her family immigrated to the US they very much kept their Italian culture alive. First living in the North End of Boston they kept chickens on their roof (only long enough for dinner) and made every meal from scratch with ingredients bought the same day. When they finally moved to the "country" (Malden, MA) they had enough space to grow a huge garden including peach trees and would can tomatoes and peaches with brandy. Food was such a huge part of our family's culture. Throughout my childhood we had Sunday dinners every week at my grandparents' house. "Dinner" would be served at 1pm and was always at least 2 courses.  On Sundays it would usually start with soup and then of course a huge spread of pastas, homemade sauce and meats. Pig skin was actually one of my favorites- until that is, I became old enough to understand what I was eating! 

We ate soup year round and I always thought that was weird, especially in the summer but did you know that eating hot foods when it is hot outside actually cools you down?! It's a scientific fact! Check out this little article: https://www.delish.com/food/a28539409/why-you-should-eat-hot-foods-on-hot-days/  Every time we'd visit my sister and I would run to the fridge to see what kind of left over soup would be waiting for us in a mason jar. My Nonno always loved to heat it up for us as a snack. 

I've eaten a LOT of soup in my time and it's safe to say my favorite is Italian Wedding soup.  This soup brings back so many memories of my childhood. I think it was my favorite because I loved the little ball shaped pastas and trying to balance the meatballs on my spoon. I have never been able to get mine to taste exactly like the way my Nonna and Auntie Eva used to make it but this is as close as I've come. There's a little time commitment in the beginning while you shape the little meatballs but I promise it's worth it! I actually always make a double batch of the meatballs and freeze one batch so that the next time I have a soup craving I'm already half way there! The other thing that is great about this recipe is that the soup comes together pretty quickly, although if I have the time I prefer to make my own chicken stalk and use that as my base. It really does give it so much more flavor. My Nonna always made the meatballs with pork (if I remember correctly by taste!) but you could use any ground meat of your choice and it would be delicious. My kids request this soup all year round, in the summer I love to serve it with crusty bread and arugula salad with olive oil, lemon juice and shaved parmesan. 


You will Need
- 64 oz of chicken broth, better if it is not "low sodium"
-1 cup acini di pepe pasta*
-3 large handfuls of baby spinach or escarole
-3 to 4 rainbow carrots chopped into bite size pieces ( my nonna never did this but I like the added color)

For the meatballs
- 1 lb ground pork
- 1 egg
-1/2 cup breadcrumbs
-1 clove of garlic
-handful of parsley
-1/4 cup grated parmesan cheese

- extra parmesan cheese for serving

*this is the ball shaped pasta that I love, if you can't find it you can substitute any small pasta


Total Prep and Cook Time- 35 min, Serves 4-6


First you have to get your meatballs assembled. Toss all of the meatball ingredients listed in a large bowl and work it with your hands to blend it together...


Then take little bits and roll between your palms to make bite size meatballs.  (If making a double batch, lay them out in a single layer on a tray and freeze for 30 min then transfer to a zip lock bag to store.)


Next fill a tall pot with the broth and another 2 cups of water.  Full sodium broth gives it a better flavor. You could also use chicken stock. Toss in your carrots if you decide to include them and bring to a boil.  Once boiling carefully lower your meatballs into the broth and then let simmer for 20-30 minutes to cook meatballs through and soften up the carrotsAs the meatballs cook you will see them start to float up to the top of the soup.


About 20 minutes into cooking add the acini di pepe and stir every few minutes so they won't stick together.  Finally stir in your spinach at the very end of cooking just to let it melt into the soup.


Ladle it up in some soup bowls and as my Nonna would say- Mangia!!


Sunday, May 31, 2020

Family Tradition- "Broccoli and Cheese Sauce"

We all have those meals that spark nostalgia for us. Something that takes us back to our childhood. Growing up in an Italian family we did not eat the typical "American" meals for dinner. My mother never made tacos, meatloaf, or shepard's pie. I actually never had any of those foods until I was an adult! We actually ate mostly vegetarian until I was in grade school and even after that meat, other than chicken, was pretty rare. Because of this my favorite childhood meals are definitely not as familiar as most kids! My favorites are pasta e fagioli, Sunday gravy with eggs, stuffed artichokes, and today's meal- broccoli and cheese sauce. I've done previous blog posts on a few of these meals that you should totally check out!

As for "Broccoli and cheese sauce" i'm sure this was my mother's healthier version of Kraft. There's really nothing to this simple meal but the taste is just sooo good! My mom always uses Jarlsberg cheese- it is a cow's milk cheese that melts all smooth and buttery. It gets its name because it originates from Jarlsberg Norway.  How my mother came to use this type,  I have no idea!  

Jarlsberg cheese can be found in most supermarkets next to the chunks of Swiss. Make sure to get the full fat version because the Jarlsberg Lite does not melt as well. This dinner comes together in no time and only uses 2 pots- bonus! It was a school night staple in our house. To save time, mother would always cook the pasta in the same water she used to cook the broccoli. While the pasta cooked she whipped up this amazing cheese sauce and then dinner was on the table.  "Broccoli and Cheese Sauce" is warm, ooey and gooey- pure childhood comfort food! My kids absolutely LOVE this dinner! In fact Lucia now makes it for us and I'm sure one day she will teach her own kids to do the same, and I LOVE that!

Total cooking time: 20 minutes
What you'll need:

1 lb pasta
2 cups Jarlsberg cheese, grated
2 cups milk
2 TBSP butter
2 TBSP flour
1 large head of broccoli

                                        
First get a big pot of salted water on to boil.  Gather the cheese sauce ingredients and rinse the head of broccoli.


When the water boils, toss in the head of broccoli and cook about 5-6 minutes until you can pierce it with a fork. Remember, we want to keep it slightly firm so it doesn't get all mushy in our pasta dish. 


Once cooked take a slotted spoon (or get yourself a spider!)  and remove the broccoli from the water. Cut into bite size pieces and set aside. Then toss the pasta in.

Time to make the cheese sauce!  This requires constant attention so it's a perfect opportunity to enlist a helper- this is how my girls started :-)

Put a small saucepan on medium high heat- add in the butter and when it is all melted stir in the flour until smooth and no lumps. Continue to give it a stir for a minute or so to "cook off" the flour taste so that your sauce will taste more cheesy.  


Then add in the milk and with either a whisk or large spoon, stir continuously until the milk begins to thicken- first it will just start to coat the spoon like this:


Then once it has considerably thickened (about 5-7 minutes), lower heat to low and stir in the grated Jarlsberg cheese. It will be stringy at first and then will smooth out and become nice and creamy.  Season with salt and pepper to your taste.


Pour the cheese sauce over the cooked pasta and stir it all up- I always loved the sound this made as a kid!  


You can then stir in the broccoli or just top your dish off with it- depending on how picky your kids are!


And there you have it- "Broccoli and Cheese Sauce"! I hope this soon becomes one of your family's favorites! xo